One shabbos way back when it came up over a meal that I like to cook, and that I owned a pizza stone and make pizza. Given that, it seems logical to assemble a bunch of friends one Saturday night and I would make pizza for everyone.
This melave malka had been in the works for months but finally came to fruition last Saturday night. People came, fun was had, and Rachel and I made pizza in the kitchen. The verdict? The people loved our pizza! In fact, some suggested we bake pies for sale during the nine days, although a quick back-of-the-envelope calculation showed that we'd be earning less than minimum wage, so we gave up that idea.
Anyway, if you want to bake pizza and impress your friends, here's how to do it.
The recipe - use this one. A couple notes about the recipe.
- You need a scale, to weigh your ingredients. There is no other way to make sure you're putting in the right amount of stuff, specifically flour.
- You need a mixer, such as a kitchenaid. We had to borrow one because we just returned ours so we could buy a 220 volt/50 Hz one (ישראל!)
- The dough is super sticky. You're gonna be like "whaaat? it toootally needs more flour, yo!" Don't do it. Just follow what Peter says.
- He says to divide each batch into 6 pieces. I divided mine into 4 pieces, and I think I made the right call.
- For the rising, we used a gallon ziplock bag for each piece. Don't forget to oil everything up, or the pizza will stick.
Our dough sat in the fridge for about 48 hours, and tasted amazing. You could get results with 24 hours, too. If you don't do the long, slow, fridge ferment it won't taste bad but you won't get the same kind of flavor we got.
On the night you want to make the pizza, you need to heat your pizza stone up for 45 minutes to an hour at some extremely hot setting, like 450 or 500 degrees if you can. That stone needs to be HOT.
A quick word. Some people claim you don't need to use a stone, and that you don't need so much heat. I can only say that these people don't like pizza with a crispy crust. They must like eating pizza that is floppy and where the dough isn't baked. Because if you, like I, enjoy eating pizza that is baked through, crispy underneath and not burnt on top you NEED to use a pizza stone. Trust me, I've been trying to recreate pizzeria pizza at home since I was twelve. I've tried 80 gajillion different ways. It's pizza stone or bust, guys.
Next, roll out the dough. If you have a really big stone, you can roll the dough onto what's called a pizza peel (those big, wooden spatulas. I have one) and bake the pizza straight on the oven, like they do in pizzerias. My stone is small, though, so what I do is form the dough in a round pizza pie pan and put that straight on the stone. It's not as crispy as if you go straight on, but it's a close second.
This dough, by the way, is going to be soft and somewhat delicate. I don't know how to toss pizza dough, but even if you do you might not want to. It's so soft and elastic that all you need is a well floured surface to just flatten it out and work it into a crust with your hands. If you're using a pan you can just spread it out towards the edges until the pan is filled.
Oh, also, I threw some cornmeal into the bottom of the pan before putting the crust down. Gives the pizza a little extra crunch. Totally optional. If you don't use a pan you can rub some corn meal on the peel, so it gets under the crust and will crisp up on the stone.
My sauce is really simple. Chop a small onion, cook in olive oil, add salt, pepper, and garlic powder, add tomato sauce. Add brown sugar. That's it. I believe that less is more - feel free to disagree and go to town on the herbs and spices, feel free to use organic heirloom tomatoes, feel free to do whatever.
It doesn't matter what you put in your sauce, but just remember that too much sauce on the pizza will make it bad. I bad 64 ounces of sauce and I barely used a quarter of that, and I made 8 pizzas. Spread the sauce really thin. It will look meager, but you will thank me later.
Then you add cheese. Actually, if Rachel is nearby, as her to add the cheese because she will add the cheese in a uniform layer, not too much and not too little. Just right.
Then slide the pizza onto the stone and bake for, oh 7 to 10 minutes. I don't know exactly. When it's done it will look done, and you will know.
Enjoy.
Friday, July 16, 2010
Corn chowder
When I worked at Mike's Bistro, they made this awesome corn chowder. It used sweet summer corn, and became super rich and creamy purely by solubilizing the sugars and starches in the corn itself. We tried to recreate this.
It didn't quite work. First of all, maybe we were supposed to use that white sweet corn and instead we used the yellow corn from Shoprite (17 cents each!). It tasted sweet to me, but maybe it wasn't sweet enough.
Also, I didn't follow a recipe. I shaved the kernels off the corn and then put them, along with sauteed onions and some spices, into a crock pot. Then I threw in the corn cobs and set it on low. The plan was for the water to slowly extract a succulent corn stock from the cobs and make the soup thick and rich. That didn't happen.
Again, might have been the corn, but I also blame the crock pot. Its low setting is pretty weak. For example, one time I put dried beans in there and set them at low for, like, 12 hours and the beans were still hard afterwards. Seriously? So maybe that's why we got no stock.
We ultimately saved the soup by dumping in some cream (when in doubt, add salt, sugar or fat) and zhuzhing it (uh, I mean pureeing it with our hand blender).
It was ok.
Fish and Chips
The other night, we were in the mood for fish and chips. That usually means deep fried fish and deep fried potatoes. We decided that frying both was too much, so we settled on frying the potatoes and making the fish with a tomato sauce.
Ever since I tasted khreimi, the North African fish dish with tomato sauce and cumin, I've been making it a lot. I often use tilapia, which isn't as good as when you make it with salmon or another richer fish. But tilapia is cheap and healthy (I think) so I usually end up buying it and making khreimi anyway.
I don't use a recipe, I just cook onions in a pan with garlic, cumin, salt and pepper, and then add tomato sauce. This time I added in some red wine too, because I had it lying around. Then you put the fish into the sauce and cook it with the top covered until it's done.
Then I made fries. Here is how to make fries the Right Way:
1. Cut away the round part of a potato (I used a baking potato, russet might have been a little better) until you have a long squared off potato
2. Cut into sticks
3. Wash thoroughly and dry on paper towels for at least 30 minutes. They should be BONE DRY
4. Heat oil to 325 degrees.
5. Fry them until they are pale and limp, a couple minutes. They will not be crispy... yet. This is ok.
6. Heat the oil to 375
7. Fry the suckas until they are golden brown and crispy
8. Apply salt
This takes a long time, especially if you are frying in batches, as I did. But they taste real good, and are worth it.
Thursday, July 1, 2010
Dumplings, stir fry, broccoli
I really like dumplings. Almost every time I order Chinese, I get dumplings, and I'm surprised why I don't see more people getting them, too. They are meaty, crispy, doughy, salty and tangy all at once. I've made dumplings once before, and tonight we decided to have them again.
Dumpling dough is super simple. Put water up to boil. Put 2 cups of flour into a bowl. Add 1 cup of boiling water. Knead. You're done!
Ok, so the hard part is kneading the dough right after you pour boiling water into it. It's pretty hot. Use your own judgment when deciding when to start kneading, but don't burn yourself. When the dough is smooth, make it into a disc and wrap with plastic wrap. Set aside for 20-30 minutes to let the gluten relax.
Then you mix ground beef with soy sauce, rice vinegar, some pepper, and whatever other spices you want - garlic (fresh or powdered), ginger, cumin - whatever you want. If you have scallions, chop 'em up and mix them in. Or dice an onion and mix that in. I didn't have chives, and didn't want to use up a whole onion for it. So mine came out tasting like little burgers. Not bad, but I prefer when they taste more like a meat filling, which means the meat needs to be supplemented with onions or some other kind of flavorful veggie.
To make the dumplings, pinch off little walnut sized pieces of dough and roll them with flour into a 3 or 4 inch circle. Mine were sticky, I should have added more flour to the dough. Next, dip your finger in water and wet the edge of the whole circle. Then, put 1 tablespoon of filling into the center. To close the dumpling, fold it into a crescent and pleat the edges over itself to create a pretty pattern, and a solid seal.
That doesn't make any sense in writing, so look for a video or pictures, or you can look at our final product. It's good to work in a team. I rolled the circles while Rachel filled and sealed them. She's a natural, by the way; they were such pretty little dumplings. Truly the work of an artist.
Then the question becomes: how to cook the dumplings. I will tell you the three ways I have tried.
1. Pot-stickers. This is how I made them the one other time I've made dumplings. You heat up a metal pan (non-non-stick, because it won't work on non-stick!), and plop your dumplings on it. You let them cook for a couple minutes. They will become stuck to the bottom of the pan. To unstick them, you pour maybe half a cup of water (check a pot sticker recipe to be sure) into the pan, and then clamp on a lid right away. The water unsticks the dumplings, and the steam causes them to finish cooking, and wrinkle. When they are done, they'll slide right out.
2. Steaming. I'll be honest. I was trying to recreate the dumplings I've eaten in restaurants. These dumplings are not wrinkled, so I know they aren't pot stickers. They are crispy on the outside, so I know there is some pan frying in involved. But they are also kind of chewy/doughy. I thought perhaps they are steamed, and then pan fried. I figured that maybe they could also just be steamed, and then be eaten in their extra-doughy state. I tested this on the first half of tonight's dumplings. I set up the steamer basket and everything, put them in and cooked them for 5 to 10 minutes. I learned two things. Firstly, steam is really hot, which is why it cooks stuff. But if you stick your fingers down in the basket, they will get steamed as well. Secondly, steaming causes dumplings to stick a little bit to the basket, and to generally disintegrate. Maybe 1/3 of them stayed together, but most fell apart to some extent.
3. Pan frying. This is what I did with the second half of my dumplings, and this time I hit the jackpot. Instead of frying them straight, as in pot stickers, you put a think layer of oil on the bottom. Then, you just keep them moving like any other fried thing, until they are brown all over and cooked through. And that's it, that's the classic restaurant dumpling - crispy, chewy, meaty.
We also made some baked broccoli (see older post), this time changing it up by adding soy sauce, so as to fit alongside the dumplings. We also had a stir fry of onions, green peppers, garlic and mushrooms.
Other than the fact that most of the food was too salty (a problem caused by adding both crystal salt and salty soy sauce to things), it was a veritable feast. Or as they say in Chinese... I have no idea.


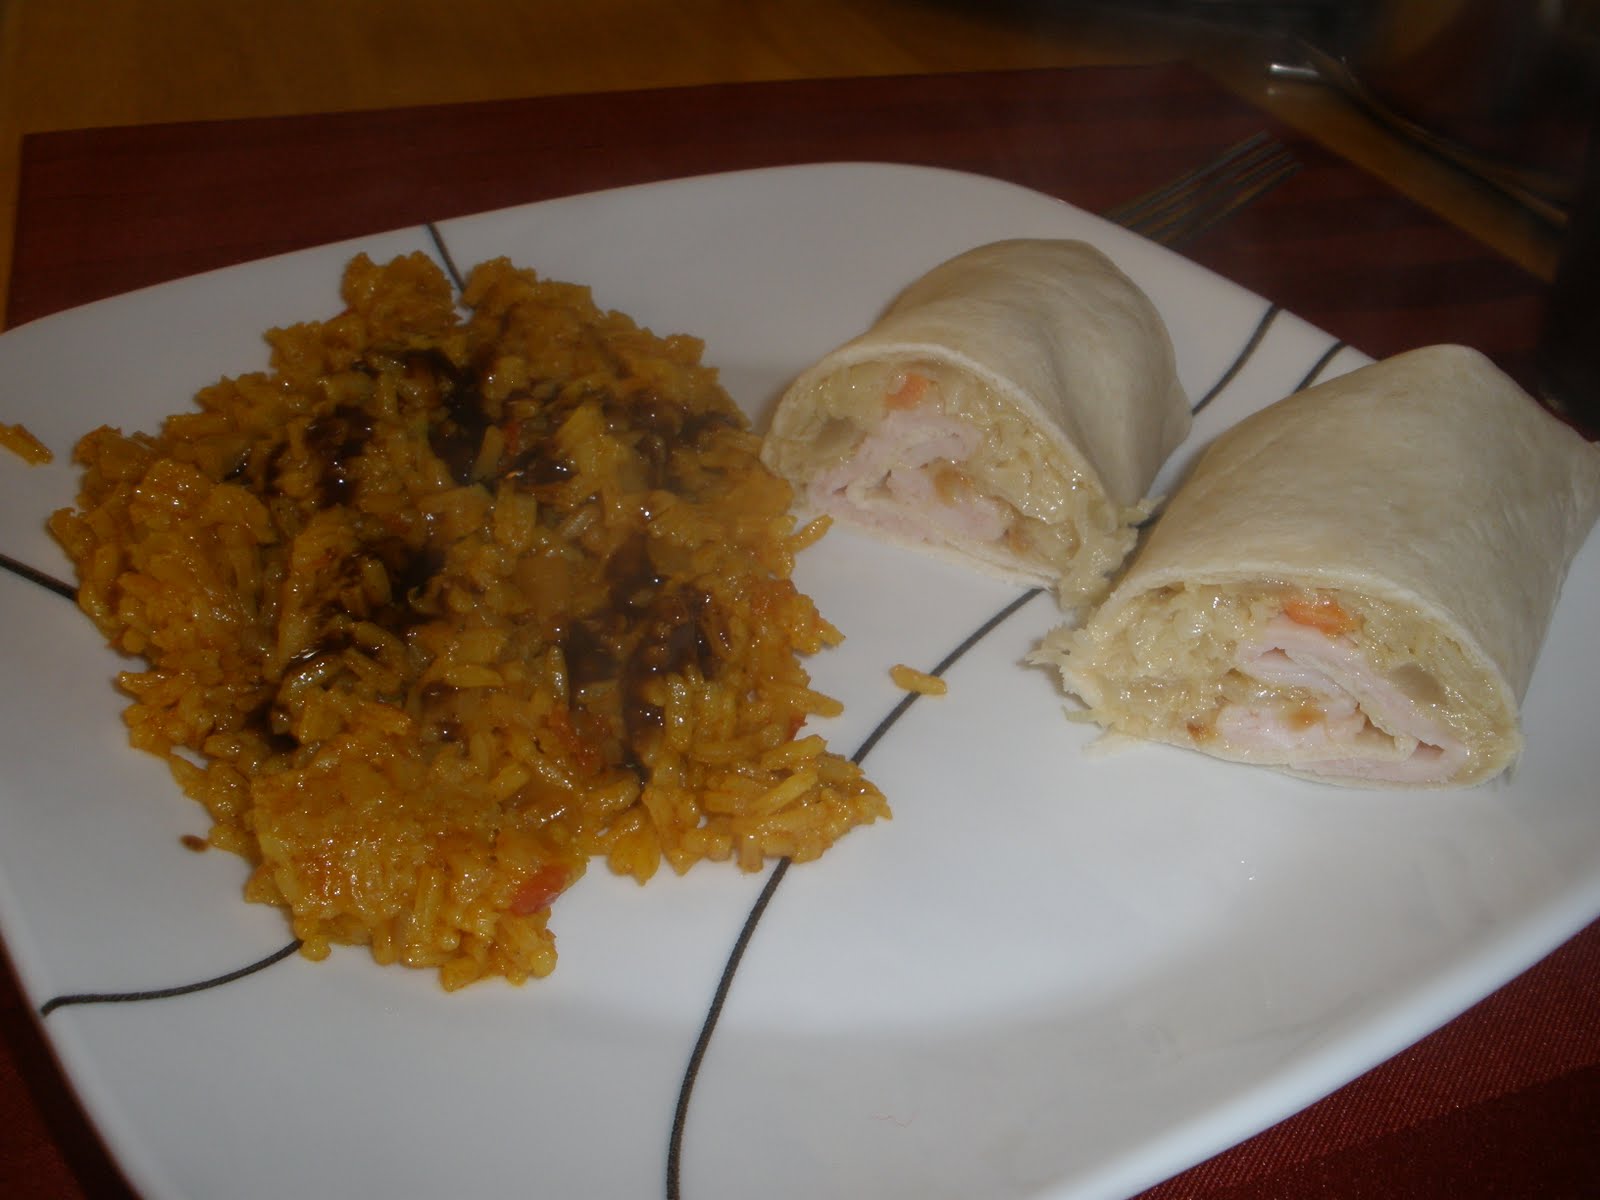
Turkey coleslaw wraps, Spanish rice
Rachel and I used to eat turkey coleslaw wraps a lot when we were dating. In case the name isn't obvious enough, you take a large tortilla, add sliced turkey, add coleslaw, and you wrap it.
On Monday night, we changed it up a little bit by cooking the coleslaw. First I finely julienne'd a small onion, and sauteed it up in oil with salt. I then added the slaw, which came in a bag. It was just cabbage and carrot I believe, but the cabbage was shredded super thin, which was nice. I sauteed that for a bit; I think I added some vinegar and pepper but I'm not really sure. Won't make a huge difference either way. Then I added a dressing of mayo and dijon, stir it in, let cook for about 30 seconds, and took off the heat. Then we assembled the wraps as usual.
To make the Spanish rice, I sauteed chopped onion in olive oil and salt, then added pepper, paprika, chili powder, turmeric, garlic, and cumin. Then I added 1 chopped tomato. I put in the rice, cooked in the oil and onions for a few minutes, then poured in some water (follow your rice's directions for amounts). When it boiled, I slapped on a cover and reduced the heat. I had to add in a bit more water at the end but after the second time around, it was done.
This is maybe the second time I've made Spanish rice from scratch (i.e. not using the Near East mix). Both times, it looks great but lacks in flavor. It probably needs more salt than anything else - although it was good that Monday's rice wasn't too salty, since the next day was a fast day. Other than salt, I don't know what gives the Near East mixes more flavor. Possibly MSG, but also it probably has some dried powdered tomato product. You'd think I'd have more tomato flavor, having used a real tomato, but I'm guessing I actually had less tomato flavor. How?
Well, here's the way I see it. Powders are concentrated flavors, and therefore can out-flavor the real thing. For instance, compare fresh garlic with powdered garlic (I'm talking about the strong stuff, the talc powder stuff). The powder is not better than fresh garlic - the latter is sweet, and rich, and acidic and flavorful. But the powder packs an unbelievable garlicky punch, because it is pure garlic taste. In terms of taste per mg (unless this unit already exists, I hereby name it the Flyshack: 1 Flyshack = 1 taste/mg), garlic powder is slightly stronger than raw, crushed garlic and certainly stronger than cooked garlic.
So I'm still looking for ingredients to put some more flavor into my Spanish rice. But it's still pretty good.
Subscribe to:
Posts (Atom)