Monday, August 29, 2011

Stuffed Peppers


Tiv'ol makes some veggie burgers that , while not as good as Morningstar Grillers, come close. We buy a package every time we do a major grocery run.

Sadly, Supersol was out the last time we went, and we had to suffice with trying Tiv'ol veggie chicken patties instead. Turns out, they leave much to be desired!

But tonight we found a use for them - stuffed peppers. By dicing and frying them up in oil with sauteed onions, these patties tasted a whole lot better. Add some black beans, a zucchini, garlic, a touch of vinegar and spices, and you've got a great pepper-stuffing. I sprinkled some dry rice over said stuffing and added maybe a cup of boiling water and stirred it all together. The peppers were laid on their sides and baked in a hot convection oven. The charring of the pepper skin was totally accidental, although totally awesome.

We ate the stuffed peppers with homemade Spanish rice (onions, tomatoes, green peppers), which I like, although to be honest I've never gotten mine to taste as good as Near East's.

Fantastic dinner, and plenty of leftovers, too.

Sunday, August 28, 2011

Pea Falafel (and Burgers)

The problem with buying a kilo of split peas is that pea soup only needs about half a kilo. Fortunately, Alton Brown has a recipe for pea burgers. Those who want to try it can easily find it themselves. We made them, and we found them to be good, if not unusually good. Pretty much like solid pea soup with some extra seasoning and breadcrumbs.

With pea burger batter left over the next day, my mind turned to something I've often thought about: can one make falafel with legumes other than chickpeas? I think it would be cool to do a four color falafel dish, one regular, one black bean, one kidney bean, and one pea (brown, black, red, green). It made sense, therefore, to try and fry this pea burger batter into pea falafel balls.

It worked, too, as long as I kept the oil around 350 degrees (F). This is pretty hard to do on a ceramic electric stove, so sometimes the oil would be too hot and burn them, and sometimes it would be too cold in which case the falafel would sort of disintegrate into the oil.

We put the pea falafel in pita and ate it with vetegables, like regular falafel. I personally prefer regular falafel, but this wasn't bad. It was good to try once, though I don't have much desire to make it again. I'd sooner just make another pea soup, which is easier. Plus, anything you make with split peas is going to end up tasting like pea soup anyway.

Saturday, August 27, 2011

Pizza Tart


You know what food is quick, delicious, easy to make yourself, and extremely unhealthy? Pizza bourekas!

Rachel and I were going to make some for dinner the other week since we had puff pastry and cheese. Then I got the idea of making this pizza tart instead. Same concept, less messy, more fancy.

Here's the recipe: it's puff pastry with carmelized onions, cheese, sliced tomatoes, and spices. Bake it. Serve it.

And if you're in Israel, do yourselves a favor and don't buy cheese that is על בסיס שמן צמחני.

Friday, August 26, 2011

Tuna Casserole

Sounds boring, right? Wrong. Tuna casserole is delicious, but it's all in the sauce

I start by making a roux; that is, equal parts butter and flour. Doesn't have to be exact and doesn't have to be much - maybe like a tablespoon of each. You cook them till it smells toasty.

From there I add milk about half a cup at a time, stirring until it gets thick, at which point more milk goes in. The idea is you keep adding milk until you have enough sauce for the pasta. In theory there should be a limit to how much milk you can add and still get a creamy sauce, but in my experience, the roux is one-size-fits all; in other words, whether you add 1 or 4 cups of milk, it will still thicken properly.

At this point, you can stop the sauce there and season with salt and pepper. It will taste like a creamy milk sauce, which would be kind of bland to just pour on pasta, but is good in this case as a base for the tuna casserole as a whole.

BUT, if you have cheese on hand, add it at the end, over the stove. Especially if you have a cheese that is otherwise not a smooth melter, like Cheddar. As a kid I used to get so disappointed, because although boring cheese like American would melt great in milk, really good cheese like Cheddar would form these rubbery clumps. But because of the starches in the roux, you can melt any cheese in this sauce.

The rest of the recipe is just mixing your sauce with some cooked pasta (for best results I'd recommend something that has lots of nooks and crannies to grab sauce - macaroni, ziti, penne, rotini, farfalle - all good choices), canned tuna, and seasoning with salt and pepper. We like ours with a little mustard and garlic powder too. If you're a ketchup fan that might work too.

Wednesday, August 24, 2011

Nutella Milkshake

Yum... What else is there to say?

I took about 2 tablespoons of Nutella and melted it in the microwave for a couple minutes until I could mix it around easily. Then poured in a little milk to help dissolve the chocolate. Mixed that around then poured it back into the glass. I used about 12 ounces of milk. Once it was all mixed together I let it run in the ice cream machine for 20 minutes or so.

The only thing missing was a straw!

Tuesday, August 23, 2011

Dry Beans: To Soak or Not to Soak


So you want to have beans for dinner but you forgot to soak the dry beans the night before?

Don't panic. I have a solution.

There's a lot of information out there about what to do with dry beans. I'll have to preface this explanation by saying that I have not done extensive research, I know what I know from experience (and having read a bit about the topic). Having cooked two different types of dry beans two nights in a row (successfully of course) I feel like I should share my knowledge.

Last night was red beans, tonight its garbanzo beans (aka chickpeas). The basic idea is the same:

1. Rinse the beans first and sift through them to make sure there aren't any pebbles or bad beans (I rarely find anything).
2. Bring them to a boil on the stovetop with plenty of water to cover them. (Make sure to use a large enough pot since the beans will expand as they absorb water).
3. Once the water boils, turn the heat down and let the beans simmer for a good 5-7 hours (depending on the bean).
4. Check on the beans about once an hour to make sure they're still simmering, not over boiling, and that they still have plenty of water covering them.

You'll know when the bean is ready by tasting it to see if it's soft enough.

This isn't exactly a viable option for those who don't have this kind of time (i.e. aren't home all afternoon) but just know that it exists.

I also want to talk about another issue with beans. That is, do you throw away the water they've been soaking/boiling in? I have yet to find a consensus on this matter. My real concern is the health factor. Those in favor of saving the water usually argue that it contains a lot of good flavors. Those in favor of throwing away the water and rinsing the beans will say that this will help digestion of the beans, that the water contains things you don't want to eat... etc.

My personal feelings are that it depends on what bean you're cooking. The way I cooked the red beans was by sauteing an onion and garlic, then adding the beans and spices. After about 5 hours of simmering the beans have absorbed most of the liquid and the liquid that's left is rich with the soft bean pulp. You can't throw that liquid away - it just wouldn't work. Garbanzo beans on the other hand, after soaking for 5-6 hours are still pretty much intact. I'd say go ahead and toss the extra liquid there.

Another interesting note on cooking beans. When I cooked the red beans I basically filled the pot with water in the beginning and that was it. With the garbanzo beans on the other hand, I added water to the pot several times. Keep on eye on them!

The point is, cooking dry beans doesn't have to be complicated but it might take a couple tries to get right. Once you figure out a method that works for you, the possibilities are endless!

Friday, August 19, 2011

Corn Muffins

Cooking is definitely a skill that can be learned and I am definitely still learning. My latest lesson involves corn muffins. Here they look deceptively delicious. Yes, they did have a lot of potential and yes, I would still highly recommend this recipe. But I have a lesson to share. When a recipe calls for a specific ingredient, make sure you know what you're doing when you swap it out for something else! (i.e. don't use a non-creamed plus a less sugar version of a can of corn) My mistake probably would have been completely OK had I just upped the sugar content in the muffins. There's always next time....

Here is the recipe:
  • 1 (14.75 ounce) can creamed corn
  • 2 cups yellow cornmeal
  • 1 cup soy milk + 3 teaspoons lemon juice
  • 2 large eggs
  • 1/2 cup oil
  • 1 cup all-purpose flour
  • 1 tablespoon white sugar
  • 1 teaspoon salt
  • 2 teaspoons baking powder
  • 1/2 teaspoon baking soda

Mix your dry ingredients in one bowl and your wet ingredients (including sugar) in another. Then add the two together and mix until combined. (You may need to add a little more flour to thicken the mixture). Spoon into muffin tin/s and bake at 450F/230C for about 15-25 minutes until golden (you will also start to see cracking on the surface). Make sure to check, using a toothpick, that the insides have baked.

Serve with honey or hot sauce, take your pick!

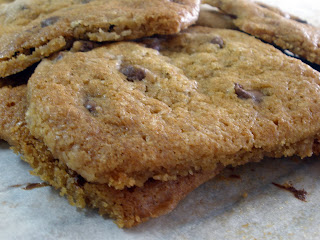
Easy Chocolate Chip Cookies

I've been searching for an easy and great tasting cookie. You may ask, what makes a great tasting cookie? In my book that means great taste PLUS soft and wonderful chewiness. And yes my search has come to an end, thanks to a friend of mine. You too can have the "perfect chocolate chip cookie" if you just follow her recipe at CountryMouseCooks. (I've also recopied it below, comments and all!)

1 c packed brown sugar
1/2 c white sugar
3/4 c margarine, melted
1 teaspoon vanilla extract
1 egg
1 egg yolk
2 c flour
1/2 teaspoon salt
1 teaspoon baking soda
1 generous cup dark chocolate chips

Mix sugars. Add melted margarine (I've tried butter and it doesn't leave the cookies as moist. Maybe it has something to do with the melting point of margarine? Any food engineers out there?), vanilla, and eggs. Dump in all the dry ingredients, mix until incorporated. Add chocolate chips.

At this point you could bake them immediately, or you could stick them in the freezer. They get more caramel-y after a good 24h in the freezer, but honestly who can wait?

Plop tablespoons of the dough on a silpat or baking sheet or baking parchment while eating big chunks with your other hand.

Bake ~10 min at 350F/165C. This is the most important part! You want to bake them until they lose the sheen on the top- only just until they stop looking gooey and wet on the top. Cardinal rule of awesome cookie making: DO NOT OVERBAKE. Let cool 2 min on the pan before you take them off, and you will have the chewiest, yummiest cookies ever.

Sunday, August 7, 2011

Sorbet Series: Peach


To make this sorbet you basically follow the green apple sorbet recipe. A couple things. I didn't blanch the peaches to remove the skin although that can be done. Instead the skin added a bit of extra color and texture to the sorbet. I wasn't too crazy about the dessert wine so I only added a little of it. I also added the juice of a lime although it's unclear how much it affected the taste overall.

We didn't actually use xanthan gum this time so we noticed that it froze a bit harder this time. If you're not using an ice cream machine, which we haven't till now, take the sorbet out of the freezer well ahead of time so it gets softer.

Saturday, August 6, 2011

Nectarine Crisps

Awhile back I made these "nectarine crisps" (for lack of a better name). They were so simple to make and absolutely delicious. Truth is you could probably substitute the nectarines with many other fruits - peaches, apples... etc. I had nectarines so that's what I used.

2 nectarines
2 tablespoons water
3 tablespoons all-purpose flour
2 tablespoons sugar
1/4 teaspoon ground cinnamon
2 tablespoons butter/margarine

1. Slice the nectarines into chunks or wedges. Place into dish. Sprinkle with water.
2. Combine the rest of the ingredients and sprinkle on top the fruit.
3. Bake at 350F/177C for about a half hour or until the topping looks crispy.

Thursday, August 4, 2011

Smells like... licorice!

I recently made a white gazpacho soup that The Pioneer Woman wrote about last week. The recipe calls for fennel, which I only just learned about for this recipe. Who knew it smells like licorice?? Check out the recipe on her website - it's pretty easy to follow. What's so great about it is that all the ingredients are pretty standard and easy to get. Plus it's interesting and different than the usual. And a chilled soup to have during the hot weather!

Tuesday, August 2, 2011

BreakFast Bagels (with a tangential discussion of regional variation in the gluten content of flour)


Why can’t one get a good bagel in Israel? To answer this question, one must understand something called the Pizza Cognition Theory, as proposed by New York Times journalist Sam Sifton. This theory states that, of the many different styles of pizza available, a person will generally prefer the style which he or she was first exposed to. This style becomes, for him or her, the very definition – nay, the Platonic ideal - of pizza.

The same can be said of bagels. Hailing from New York, that means I like bagels to have a glossy crust that crisps when toasted, and a doughy, dense yet soft, malty center. And poppy seeds, but that’s just me. Rachel’s Philadelphia kosher bagels are, in essence (as well as in name), New York Bagels. So we’re on the same page.

However, the NY bagel is not the only variety. Here in the Israel, the thinner, breadier, sometimes oval-shaped, and always sesame seed coated bagels are as much a local fixture in Arab and Middle-Eastern Jewish cuisine as their Yankee cousins. Thus, I posit that the primary reason one can’t get a “good” bagel in Israel is because most people here prefer what they’ve already got anyway.

That being said, there are plenty of places where you can get NY style bagels, usually in cities and neighborhoods populated by US expats. But any real bagel fan will tell you that the a bagel from Tal Bagels may be tasty, but isn’t the same. So the real question is: why is it so hard to recreate NY bagels in Israel?

No, the answer is not the water. It’s the flour. Israeli flour has less gluten in it, or to be more precise, comes packaged with less gluten in it. This was verified by a recent blog post I read, along with the additional information that Israeli flour is usually processed less and not bromated or bleached (although I usually bought unbleached flour in the US as well), and that US flour actually often has pure gluten added to it directly.

I could have told you that on my own after this attempt to make bagels. I was following a recipe from Peter Reinhart, whose book has so far given me a very reliable recipe for pizza dough, but I noticed that the dough was not developing as I was expecting it to. Undeveloped dough tears apart when you pull it, but proper gluten development gives you a dough that is increasingly smooth and elastic. This takes kneading and time, both of which I applied with my Kitchenaid dough hook. But the minutes went by and my dough was extremely soft, and totally lacking in smoothness and elasticity. It was still tearing.

I knew at once that there wasn’t enough gluten. The solution? Add more flour, I suppose. I kept adding, and adding flour. The dough absorbed it, but despite intense and extensive kneading, it just did not get right. Frustrated, I cranked up my already hot mixer and tried to beat the gluten into submission.

And then my Kitchenaid busted an axle.

The moral of the story is: don’t get frustrated in the kitchen (also don’t take on new cooking projects on fast days, when you are more likely to get frustrated). But although fixing the mixer will surely be an uphill battle, the bagels were not lost. After kneading by hand for a while, and seeing no improvement, I decided to shape the bagels, let them rise for the amount of time stated in the recipe, boil them and bake them. The boiling was done in water with a pinch of baking soda added to it, and the baking was done at some high temperature, with convection, with a flipping step, for an arbitrary period of time until they looked brown and tasty.

Those instructions are kind of vague, and they also leave out the sponge stage at the beginning where a thin, pancake-like dough is set out to ferment with two hours. This is because the bagels, while they tasted good, were not what I expected. The doughiness was too much, they didn't rise properly. The outsides were not smooth and too hard and thick.

But really, they were tasty. I strongly believe that this is highly independent of recipe. Google any bagel recipe, or this one, and make it. It’s probably your first time boiling bread before baking it, but it’s very easy if you just follow the instructions. It’ll taste good because it’s fresh and you made it.

Looking forward, I am going to try and find a place where I can buy pure flour gluten, which I do know is made by an Israeli company. Then it’s just a matter of either research or experimentation until I find the combination I want to recreate US bread flour and US all-purpose flour. The blog post has a suggestion, but since it is in volume measurements I can’t take it seriously. He does recommend sifting, though, which is a good tip.

And like I said before, Rachel and I really did enjoy these bagels. If I don’t find gluten soon I’m probably going to just make them again anyway.