Sunday, December 4, 2011

The Turducken Post


Thursday, Nov 24, 7:30 PM

I am ready to begin. All three birds are sitting in the fridge - a frozen duck that's been thawing for the last few days, a turkey that took two visits to Supersol to get, and a chicken. I'm slightly concerned, because the duck is supposed to be larger than the chicken, but Israeli chickens are significantly larger than American chickens, and it looks like the opposite is true for ducks. More on that later.

My team arrives - Akiva, Ari and Levi. Ari brings bags full of produce and gear - thermometers, knives, latex gloves, a blowtorch. He probably has a nuclear reactor in that bag somewhere, just in case. I put Levi to work doing stuffing prep - lots of vegetable dicing and manning the stove. Ari, Akiva and I each take a bird, a cutting board and a knife. Akiva has been methodically honing his knife for the last 30 minutes with an intense look on his face - I am scared but also excited. We're going to be de-boning on the plastic folding table, which has been covered with a plastic table cloth. In Rachel's words, "at least the plastic table can be Chloroxed down after".

There are some dishes in the sink with my name on them, but Rachel takes pity on me and cleans them. Then she retires to the guest room and closes the door, so that she will not have to watch poultry being deboned.

8 PM

We have made our incisions. Ari and I have made very little progress, despite having watched numerous Youtube vidoes in preparation. Akiva, meanwhile, has deftly deboned half of his duck. I jealously accuse him of hustling us, but he insists this is his first time. Levi mows through vast quantities of onions, celery and green bell pepper.

9 PM

The deboning is finished, much earlier than expected. Deboning is not super easy, but it's not as hard as I thought it'd be, especially with two helpers. We all turn to the stove to help Levi turn out three stuffings - cornbread gizzard stuffing, sausage stuffing, and mushroom stuffing.

10 PM

With the stuffings all made, we begin to assemble. It's like a bizarre operating table with three gloved (of course.. don't worry) men holding, tugging and stuffing fowl as tightly as possible, crudely weaving the seams together with wooden skewers. I'd say next time I'll use butcher twine, but there isn't going to be a next time.

I was right, and the duck is about the same size as the chicken. Still, we stick to protocol and we do our best to wrap it around. It's kind of a mess, but we're wearing gloves and there's plastic protecting the table, so it's all good. We try to stuff the duck inside the turkey, but it looks like it won't fit. We'll make it fit, I say, and we begin to tug at the turkey skin. Turkey skin, we discover, is slightly elastic, and stretching does the trick. My friends hold the seam in place, and I weave (more like ram) skewers through it. We don't do a very neat job, but the skewers will come out in the end, anyway. We hoist the bird into the roasting pan. It looks like a fat man in an undersized bathtub. The whole thing is crazy heavy - must be at least 40 pounds. We celebrate, and Rachel snaps some photos.

12 AM

The mess wasn't that bad, but it still took a while to clean, even with very generous and undeserved help from Rachel. I sit down and eat my snack - leftover gizzards that I floured and fried until crispy. The gizzards are extremely salty, but fried in flour with hot sauce on top, the saltiness is tolerable and almost decadent. They are a little tough, though. According to the Internet, I'd have gotten better results if I'd boiled them first for about 15 minutes - this would have made them softer and also leached out a bit of that salt. I'll probably make them again some time; being the cheapest part of the chicken, gizzards make an affordable snack. You can often buy a kilo for under 10 shek.

Friday

7 AM

Ahh! My alarm was supposed to wake me up an hour ago! I hurry out of bed and wash up quickly. I plunge the meat thermometer into the turducken - it's a very neat thermometer that simultaneously measures the internal temperature of the meat as well as the oven temperature. A quick google conversion tells me that 225 F is equal to 107 C. I turn the oven to about 125 C just to be safe, and turn on the convection fan to distribute the heat more evenly.

Meanwhile, I take a stockpot out of the fridge. Inside are all the bones from last night, roasted for about an hour in the oven. I pour water over them and start making the greatest poultry stock ever.

7:30 AM

Oops, I forgot to do a spice rub! I take the turducken out, and rub it with some spices (gloved hands, again), then put it back.

8 AM

I am pleased with my temperature control. The oven is maintaining a consist temperature hovering just above 225 deg F. According to the Internet, this temperature will cook my turducken in 8 to 9 hours, bringing it to completion before shabbat. Jeffrey Steingarten needed over 12 hours to make his, but he was cooking at 190 deg F, significantly cooler. I should be fine.

10:15 AM

The temperature has been holding steady, but I still don't see any juices in the pan. Turduckens are supposed to exude enormous volumes of beautiful golden liquid, and it's important to periodically remove it. You don't want your turducken to stew instead of roast, and, in my case, I don't want the liquid to flood and spill out of the pan and start a fire. I have a turkey baster at the ready, but there's only the slightest bit of juice at the bottom! Am I doing something wrong? Maybe the juice will come later?

11:30 AM

It's been over four hours, which means I'm supposed to brush oil over the turducken, and then cover it with foil. The internal temperature has risen to 130 F. I take it out of the oven and - behold! - some juice has indeed collected in the pan. Nothing like the opaque swimming pool of yellowness that I was expecting, but lots of golden, savory gravy. I collect it eagerly, get the birds oiled and foiled, and return the behemoth to its slow, steamy cell.

1:30 PM

150 F! This bird is actually going to cook!

3 PM

165 F! Just as our guests walk through the door, I triumphantly hoist the finished 'ducken and set it down to rest. It is golden and beautiful.

4 PM

We put the turducken on the plata

6:30 PM

After kiddush and motzi, I immediately begin carving the turducken, while Rachel tends to the salads and whatnot. I find that it is completely impossible to cut neat, whole slices containing clearly visible layers of meat and stuffing. I mostly blame the duck, which, in its central location, is supposed to lend structural support to the finished product - ours does not, because it is a small duck, and therefore we can't have neat slices. Maybe no one who makes turducken ever gets neat slices. In any event, I decide to simply cut up the turducken and pile it, casserole-like, on large serving platters. Our guests poke around the platters, taking what they wanted, and sometimes requesting certain parts (usually duck). We pass around two bowls of gravy, and I wonder what we were going to do with the other gallon of gravy I have sitting on the counter. And then we taste.

It was all worth it, folks. Don't listen to those who say turducken is no greater than the sum of its parts, they are wrong. All of the birds are cooked wonderfully - juicy and not at all dry. This is an obvious consequence of their low, slow cooking. The stuffings lost their individual distinction, but blended into one that was mouth-wateringly rich, full of salt and juices, sweet grainy cornbread, pungent herbs and savory aromatic vegetables. It is messy, but it packs a wallop of comfort-food-Thansgiving FLAVOR!

And I'm never doing it again.

Friday, November 11, 2011

Banana ice cream


Pictured here with microwaved-Nutella hot fudge and whipped cream!

If you have an ice cream maker, make this ice cream! I used Alton's recipe, and added a little milk to the cream to cut down on that coated-mouth-taste you sometimes get with very creamy ice cream recipes.

Also use very ripe bananas, because they are very sweet.

Thursday, November 10, 2011

Fall Friday breakfast: French toast and hot cocoa


You don't need me to tell you that French toast made out of chala leftovers is awesome. What I will add, though, is that Israeli date syrup makes a fine maple syrup substitute. On this occasion, we didn't even have that, so I resorted to spreading a thin layer of raspberry jam and coating with some fresh real whipped cream.

To adapt a joke from P&R, it wasn't really that amazing, OH WAIT IT SUPER WAS.

The hot cocoa was a recipe, again, from Jeffrey Steingarten. It's basically half a chocolate bar shaved down and stirred into boiling milk, along with some cocoa powder and sugar. I'd never have thought of adding cocoa powder, but it retrospect it seems so obvious. The other step I wouldn't have thought of is to stick blend the cocoa for a few minutes at the end to really emulsify everything, and give the cocoa a rich foam on top.

Tuesday, November 8, 2011

Fudge and PB cookie sandwiches


This dessert was really a combination of two previous desserts. We love our recipe for chocolate fudge cookies, and we also really like mixing peanut butter with chocolate. So this recipe practically wrote itself!

The main question was how to do the peanut butter filling. Last time, we mixed peanut butter with parve creamer and whipped it up into a peanut butter foam. I was afraid that would not hold up for this application, and so I instead went to work making a peanut butter pudding with some fish gelatin I bought a while ago.

The fish gelatin instructions only tell you to dissolve a whole packet in 1/2 cup of milk or water for 20 minutes, then to heat the whole thing to 50-60 degrees C. I added two packets to 1 cup of soymilk with peanut butter mixed in and waited. 20 minutes later, it was a hard lumpy mess. I heated it and added more soy milk, which resulted in a nice smooth liquid.

Getting past this smooth liquid was the hard part. As a liquid, it was too runny. After chilling in the freezer, though, it got too hard and rubbery. Depending on the texture, the taste varied from smooth and creamy to chewy-pudding. But it always tasted like peanut butter, which was the main point.

It was hard to work with my peanut-pudding, but the filling was ok in the end. I think next time I'd use the peanut butter whipped cream from last time.

Oh, another weird thing was that the peanut filling seemed to cause the cookies to lose their stiffness and instead become soft mushballs. Oh well, it's fudge anyway, right?

Monday, November 7, 2011

Grilled cheese with mushrooms, and broccoli`


The broccoli was roasted just like the other time. And the grilled cheese was, well, grilled cheese - but with thin slices of some large mushroom I bought at the store. Wasn't quite Portobello but bigger than the average button 'shroom. The slices were seared quickly before the sandwich.

My only tip on the very simple task of grilled cheese making: mix butter and olive oil on the skillet, and cook the sandwiches in that. It gives you the butter flavor, but the olive oil keeps the fat from smoking up and burning too quickly. And be generous with that skillet fat, folks.

Sunday, November 6, 2011

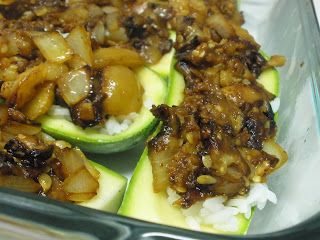
Stuffed zucchinis


I have to kind of squint at this one to remember exactly what I did here. I'm pretty sure I hollowed out some zucchinis and reserved the flesh. Onions got chopped up and fried in olive oil with garlic, and the scooped zucchini was added in along with some chopped eggplant. Spices almost certainly included salt, pepper, and paprika, though turmeric and cumin would also be appropriate. Then I cooked up some white rice, and layered it all together. I expected it all to meld together in a way that didn't happen, so I'd recommend that when you make this you mix the cooked rice with the veggies, or just cook it all together. It was tasty, though.

Saturday, November 5, 2011

Easy as Pie


To make this dessert we
  1. Thawed some puff pastry and put it in a pie tin
  2. Cut up some ripe fruit (nectarines, I think), mixed it with lemon juice, cinnamon, brown sugar and a little salt and put it in the pastry
  3. Made a topping by blending equal parts margarine, white sugar and flour, and dotting it all over the fruit
  4. Baked it

Friday, November 4, 2011

Sushi


Is this the first post I've written about sushi? It's certainly not the first time we've made sushi - we love it! I think the number one best thing about making sushi at home is the cost savings. Restaurant rolls cost 20-30 shekel each, and for about that much you can buy a bag of sushi rice and a package of nori, enough for at least 20 rolls. Yes, the ingredients cost money too, and there is the factor of time and effort. But a ten-fold markup? Seriously.

Making sushi is pretty straightforward, so I'll stick to a few bullet points:
  • I tried using Supersol brand risotto rice instead of sushi rice. It didn't work.
  • If you don't like the texture of your sushi rice when it finishes cooking, try soaking the rice - in the cooking water - on the counter before cooking. 30 minutes in the summer, 60 minutes in the winter.
  • Fake crab/shrimp is not available in Haifa, but we filled the fish requirement with lox, which was very good. I also bought some tuna from a fishmonger who told me it was sushi quality. In reality, it was gray and fishy smelling, so I decided to poach it in oil, then mix it with mayo and hot pepper for "spicy tuna". It basically tasted like canned tuna fish.
  • For real sushi grade fish, look for "red tuna". It's flash frozen, in shrink wrapped plastic. It comes in small, wedge shaped portions, which is a good amount for a few rolls of sushi. I'd use it. Some people also buy large salmon fillets and make sushi out of this. This strikes me as a bad idea, both because the salmon quality seems less pristine then the "red tuna" and because finding sushi-appropriate tender slices seems trickier. Your call.
  • Here are some good non-fish sushi fillings: avocado, cucumber, mushrooms (chopped and sauteed with miso, soy sauce and garlic), zucchini (amazing), sweet potatoes (roasted with honey and brown sugar), omelette slices...

Thursday, November 3, 2011

Broccoli on Broccoli


I first separated the broccoli stalk from the florets. The florets got roasted in the usual combination of olive oil, lemon juice, garlic, salt, pepper and paprika. The stalk got diced and went into a pot of simmering milk. After a while, the stalk pieces softened and I stick-blended the whole thing into a creamy, broccoli flavored sauce. I don't remember details such as whether it contained sauteed onions and/or cheese, but those would both be appropriate.

The sauce went over spaghetti, and the roasted florets on top of that. Delicious.

Wednesday, November 2, 2011

Pumpkin Pie


If you don't live near a place like Yerushalayim, Efrat, or Ra'anana, you probably don't have supermarkets that specialize in imported American products and, consequently, it's probably hard for you to find canned pumpkin.

Fortunately, making your own pumpkin puree is super easy if you have a stick blender. Much easier, in fact, since Israeli pumpkin comes in large, solid blocks of pumpkin flesh - no messy scooping necessary. Just remove the rind, and cut the pumpkin into slices. Roast 'em on a baking sheet with a little salt for, I don't know, 20 minutes? It doesn't take long, and when they are soft they are done. Toss in a bowl, apply stick blender, and you have a pumpkin puree that is more orange than anything that comes out of a can. Tastes the same, but man - it's so orange!

Use in whatever pie recipe you like. We were invited to a dairy meal, so I took the opportunity to make Alton's pumpkin pie. Instead of graham crackers, I used Honey Nut Cheerios, and it worked, I just added a little water or extra butter or something to hold it all together.

Tuesday, November 1, 2011

Beef Tacos

(Not an actual picture of our taco meat, but ours looked a lot like this)

I am in the middle of reading Jeffrey Steingarten's two books, and in one of them he writes about eating delicious beef tacos in Tijuana. Now, usually, when reading about Jeffrey's globetrotting culinary adventures I content myself to live vicariously, salivating at the descriptions of treif, forbidden treats. Surprisingly, though, the tacos he raves about contain beef (not pork) and no dairy! This last point is truly surprising, since almost all Tex-Mex dishes mix their basar and chalav.

In fact, it is a dilemma that I have still not, and may never resolve: are kosher Tex-Mex dishes better with real meat, and fake or no cheese, or the reverse? Here at SupperForTwo, our enchiladas, burritos, nachos, and tacos are always dairy. In fact, we were planning to have veggie burger tacos last Wed night. But Jeffrey's description of his beef taco would not leave me alone, and so I called Rachel at the last minute to inform her that, tonight, our tacos will be beef.

The biggest question here is: which cut (or number in Israel) of beef is right for tacos? I'm not talking about a cheap, ground meat taco, because that's not what Jeffrey ate. He says to use flank steak, which is commonly recommended for beef fajitas which, at the end of the day, are basically the same thing: beef wrapped in a flour tortilla with meat, guacamole, tomato salsa and chili pepper sauce.

True flank steak is a hind cut, which makes it unavailable in America - use skirt steak instead, if you can find it. Here in Israel, where we are blessed with nikkur and the hind cuts it permits, flank steak is #17. I asked the butcher for #17 and he pointed to a piece of meat that looked about right. But then I asked for it, and he changed his mind, telling me actually he thinks that piece is #14 (the bottom sirloin).

Now, this butcher might have been senile, but he might have also been lying to just get me to leave so he wouldn't have to cut anything (it was late and the store was nearly empty). The question, thus, was whether I should buy a piece of meat that might be flank steak but might be bottom sirloin.

What's the difference, you ask? It all comes down to tenderness. There are really only two cuts of beef that are naturally tender - rib eye and filet mignon. These muscles are low in collagen, the stuff that holds muscles together and makes meat tough. You cook up rib eye or filet mignon just till they are done, and the low-collagen meat will be juicy and tender. Any other cut of meat needs to be cooked slowly, at a low temperature - this breaks down the collagen and makes the meat tender.

However, there is one other way you can get around the tough collagen in a non-rib eye or filet mignon cut of meat. You can cook it briefly, and slice it thinly against the grain, which cuts up the long collagen ropes into little stubby pieces that your teeth can easily chew. However, some cuts are really too tough even for this. I once bought a shoulder cut, sliced it thin, and tried to make a Philly-style steak sandwich (no Wiz, obviously) - it was ok, but too tough. Therefore, you have to know if your tough cut is really tough, or just a little tough.

Back to Supersol. I bought the meat because I figured that if the meat was in fact bottom sirloin, it was close enough (on the cow) to the flank, that it would be a similar muscle. Maybe I also thought, in the back of my head, that the sirloin is one of the more tender of the non-tender cuts. Maybe I just wanted tacos, and took my chances.

It paid off. I sliced the piece of meat into three flat steaks, sprinkled them with salt, pepper, garlic, paprika and a little cumin, and then browned them in a hot cast iron skillet with a little oil. Just a couple minutes on each side, and then I sliced them super thin across the grain. The result - juicy, beefy, TENDER, savory delicious crust on each little bite...

Oh, right - also there were flour tortillas, which I fried. Yeah, I meat to just brown them but I ended up deep frying them. It was amazing, ok? Guac, diced tomatoes, lettuce, and Goya's ancho flavored salsita (our stash is dwindling. sigh.) were all the meat needed. SO GOOD.

Soo, just to recap: try and get #17 beef, but I may have gotten #14 by accident and, if so, it was just as good.

Monday, September 19, 2011

Granola and Yogurt


This is my new favorite breakfast. In stores, a tiny, unsatisfying cup can be bought for 6 shekels. Larger, more satisfying cups cost upwards of 12 or 15 shekels from Cafe Greg. I figured if I want to eat this stuff every day, I'd better start making it myself.

The granola is homemade, the yogurt is not. My granola is based on a recipe from smitten kitchen, but anyone can make granola by following these vague guidelines:

Mix two parts dry oats, one part shredded coconut, and one part some other nut on a baking sheet. Toast for about 10 minutes. If you don't like coconut, leave it out. If you're on the fence about coconut, put it in; you will be rewarded with a seriously awesome toasty smell.

Next, stir in some pieces of whatever dried fruit you want. Then, pour in some honey. If you can't approximate it by eye, base yourself off a recipe. Lastly, bake it all together.

Since I plan on eating my granola loose, I don't care if my final product is sloppy. If you want your granola in bars, you should do more reading. This is my second batch of granola, and the bars fell apart in my first batch.

Stay tuned for a future post. When that store bought yogurt runs out I'm gonna try making my own...

Wednesday, September 7, 2011

Mocha Pops


Who doesn't love popsicles?  They're so easy and fun to make.  I used little espresso cups and wooden popsicle sticks for the mold but I plan on coming up with more creative molds soon!  The bottom half is coffee (instant coffee, milk, sugar), the top half is instant pudding mix (prepared with 3% milk).  Let the bottom freeze first before pouring the top half.  To get the popsicle sticks to stay in place, cover the rim of the cup with foil and poke a hole through for the stick.  Stay tuned for more ideas...

Monday, September 5, 2011

Mushroom Onion Feta Cheese Quiche


I love making quiche. Not only do I get to make my very own easy pie crust but there are so many variations I can try. And I'm pretty much guaranteed to have all the basic ingredients at all times. Plus, it takes no time at all to prep... This week's quiche - Mushroom Onion Feta. I highly recommend this one!

Ingredients:
Approx. 8 oz Mushrooms, sliced
1 Onion
1/2-1 cup Feta cheese, crumbled
1/2 cup Milk
3 eggs
Pepper
Olive oil
Pie crust

Directions:
1. Saute the onions in a little bit of olive oil till they're clear and soft. Remove the onions to a separate bowl and saute the mushrooms for just a minute or two until they start to turn darker in color.
2. Combine the milk, eggs, onions, mushrooms and pepper. Pour into pie crust.
3. Sprinkle the feta on top.
4. Bake at 375F/200C for about 30-40 minutes or until the the quiche is set.

Monday, August 29, 2011

Stuffed Peppers


Tiv'ol makes some veggie burgers that , while not as good as Morningstar Grillers, come close. We buy a package every time we do a major grocery run.

Sadly, Supersol was out the last time we went, and we had to suffice with trying Tiv'ol veggie chicken patties instead. Turns out, they leave much to be desired!

But tonight we found a use for them - stuffed peppers. By dicing and frying them up in oil with sauteed onions, these patties tasted a whole lot better. Add some black beans, a zucchini, garlic, a touch of vinegar and spices, and you've got a great pepper-stuffing. I sprinkled some dry rice over said stuffing and added maybe a cup of boiling water and stirred it all together. The peppers were laid on their sides and baked in a hot convection oven. The charring of the pepper skin was totally accidental, although totally awesome.

We ate the stuffed peppers with homemade Spanish rice (onions, tomatoes, green peppers), which I like, although to be honest I've never gotten mine to taste as good as Near East's.

Fantastic dinner, and plenty of leftovers, too.

Sunday, August 28, 2011

Pea Falafel (and Burgers)

The problem with buying a kilo of split peas is that pea soup only needs about half a kilo. Fortunately, Alton Brown has a recipe for pea burgers. Those who want to try it can easily find it themselves. We made them, and we found them to be good, if not unusually good. Pretty much like solid pea soup with some extra seasoning and breadcrumbs.

With pea burger batter left over the next day, my mind turned to something I've often thought about: can one make falafel with legumes other than chickpeas? I think it would be cool to do a four color falafel dish, one regular, one black bean, one kidney bean, and one pea (brown, black, red, green). It made sense, therefore, to try and fry this pea burger batter into pea falafel balls.

It worked, too, as long as I kept the oil around 350 degrees (F). This is pretty hard to do on a ceramic electric stove, so sometimes the oil would be too hot and burn them, and sometimes it would be too cold in which case the falafel would sort of disintegrate into the oil.

We put the pea falafel in pita and ate it with vetegables, like regular falafel. I personally prefer regular falafel, but this wasn't bad. It was good to try once, though I don't have much desire to make it again. I'd sooner just make another pea soup, which is easier. Plus, anything you make with split peas is going to end up tasting like pea soup anyway.

Saturday, August 27, 2011

Pizza Tart


You know what food is quick, delicious, easy to make yourself, and extremely unhealthy? Pizza bourekas!

Rachel and I were going to make some for dinner the other week since we had puff pastry and cheese. Then I got the idea of making this pizza tart instead. Same concept, less messy, more fancy.

Here's the recipe: it's puff pastry with carmelized onions, cheese, sliced tomatoes, and spices. Bake it. Serve it.

And if you're in Israel, do yourselves a favor and don't buy cheese that is על בסיס שמן צמחני.

Friday, August 26, 2011

Tuna Casserole

Sounds boring, right? Wrong. Tuna casserole is delicious, but it's all in the sauce

I start by making a roux; that is, equal parts butter and flour. Doesn't have to be exact and doesn't have to be much - maybe like a tablespoon of each. You cook them till it smells toasty.

From there I add milk about half a cup at a time, stirring until it gets thick, at which point more milk goes in. The idea is you keep adding milk until you have enough sauce for the pasta. In theory there should be a limit to how much milk you can add and still get a creamy sauce, but in my experience, the roux is one-size-fits all; in other words, whether you add 1 or 4 cups of milk, it will still thicken properly.

At this point, you can stop the sauce there and season with salt and pepper. It will taste like a creamy milk sauce, which would be kind of bland to just pour on pasta, but is good in this case as a base for the tuna casserole as a whole.

BUT, if you have cheese on hand, add it at the end, over the stove. Especially if you have a cheese that is otherwise not a smooth melter, like Cheddar. As a kid I used to get so disappointed, because although boring cheese like American would melt great in milk, really good cheese like Cheddar would form these rubbery clumps. But because of the starches in the roux, you can melt any cheese in this sauce.

The rest of the recipe is just mixing your sauce with some cooked pasta (for best results I'd recommend something that has lots of nooks and crannies to grab sauce - macaroni, ziti, penne, rotini, farfalle - all good choices), canned tuna, and seasoning with salt and pepper. We like ours with a little mustard and garlic powder too. If you're a ketchup fan that might work too.

Wednesday, August 24, 2011

Nutella Milkshake

Yum... What else is there to say?

I took about 2 tablespoons of Nutella and melted it in the microwave for a couple minutes until I could mix it around easily. Then poured in a little milk to help dissolve the chocolate. Mixed that around then poured it back into the glass. I used about 12 ounces of milk. Once it was all mixed together I let it run in the ice cream machine for 20 minutes or so.

The only thing missing was a straw!

Tuesday, August 23, 2011

Dry Beans: To Soak or Not to Soak


So you want to have beans for dinner but you forgot to soak the dry beans the night before?

Don't panic. I have a solution.

There's a lot of information out there about what to do with dry beans. I'll have to preface this explanation by saying that I have not done extensive research, I know what I know from experience (and having read a bit about the topic). Having cooked two different types of dry beans two nights in a row (successfully of course) I feel like I should share my knowledge.

Last night was red beans, tonight its garbanzo beans (aka chickpeas). The basic idea is the same:

1. Rinse the beans first and sift through them to make sure there aren't any pebbles or bad beans (I rarely find anything).
2. Bring them to a boil on the stovetop with plenty of water to cover them. (Make sure to use a large enough pot since the beans will expand as they absorb water).
3. Once the water boils, turn the heat down and let the beans simmer for a good 5-7 hours (depending on the bean).
4. Check on the beans about once an hour to make sure they're still simmering, not over boiling, and that they still have plenty of water covering them.

You'll know when the bean is ready by tasting it to see if it's soft enough.

This isn't exactly a viable option for those who don't have this kind of time (i.e. aren't home all afternoon) but just know that it exists.

I also want to talk about another issue with beans. That is, do you throw away the water they've been soaking/boiling in? I have yet to find a consensus on this matter. My real concern is the health factor. Those in favor of saving the water usually argue that it contains a lot of good flavors. Those in favor of throwing away the water and rinsing the beans will say that this will help digestion of the beans, that the water contains things you don't want to eat... etc.

My personal feelings are that it depends on what bean you're cooking. The way I cooked the red beans was by sauteing an onion and garlic, then adding the beans and spices. After about 5 hours of simmering the beans have absorbed most of the liquid and the liquid that's left is rich with the soft bean pulp. You can't throw that liquid away - it just wouldn't work. Garbanzo beans on the other hand, after soaking for 5-6 hours are still pretty much intact. I'd say go ahead and toss the extra liquid there.

Another interesting note on cooking beans. When I cooked the red beans I basically filled the pot with water in the beginning and that was it. With the garbanzo beans on the other hand, I added water to the pot several times. Keep on eye on them!

The point is, cooking dry beans doesn't have to be complicated but it might take a couple tries to get right. Once you figure out a method that works for you, the possibilities are endless!

Friday, August 19, 2011

Corn Muffins

Cooking is definitely a skill that can be learned and I am definitely still learning. My latest lesson involves corn muffins. Here they look deceptively delicious. Yes, they did have a lot of potential and yes, I would still highly recommend this recipe. But I have a lesson to share. When a recipe calls for a specific ingredient, make sure you know what you're doing when you swap it out for something else! (i.e. don't use a non-creamed plus a less sugar version of a can of corn) My mistake probably would have been completely OK had I just upped the sugar content in the muffins. There's always next time....

Here is the recipe:
  • 1 (14.75 ounce) can creamed corn
  • 2 cups yellow cornmeal
  • 1 cup soy milk + 3 teaspoons lemon juice
  • 2 large eggs
  • 1/2 cup oil
  • 1 cup all-purpose flour
  • 1 tablespoon white sugar
  • 1 teaspoon salt
  • 2 teaspoons baking powder
  • 1/2 teaspoon baking soda

Mix your dry ingredients in one bowl and your wet ingredients (including sugar) in another. Then add the two together and mix until combined. (You may need to add a little more flour to thicken the mixture). Spoon into muffin tin/s and bake at 450F/230C for about 15-25 minutes until golden (you will also start to see cracking on the surface). Make sure to check, using a toothpick, that the insides have baked.

Serve with honey or hot sauce, take your pick!

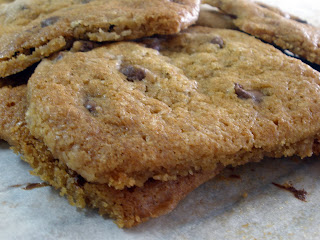
Easy Chocolate Chip Cookies

I've been searching for an easy and great tasting cookie. You may ask, what makes a great tasting cookie? In my book that means great taste PLUS soft and wonderful chewiness. And yes my search has come to an end, thanks to a friend of mine. You too can have the "perfect chocolate chip cookie" if you just follow her recipe at CountryMouseCooks. (I've also recopied it below, comments and all!)

1 c packed brown sugar
1/2 c white sugar
3/4 c margarine, melted
1 teaspoon vanilla extract
1 egg
1 egg yolk
2 c flour
1/2 teaspoon salt
1 teaspoon baking soda
1 generous cup dark chocolate chips

Mix sugars. Add melted margarine (I've tried butter and it doesn't leave the cookies as moist. Maybe it has something to do with the melting point of margarine? Any food engineers out there?), vanilla, and eggs. Dump in all the dry ingredients, mix until incorporated. Add chocolate chips.

At this point you could bake them immediately, or you could stick them in the freezer. They get more caramel-y after a good 24h in the freezer, but honestly who can wait?

Plop tablespoons of the dough on a silpat or baking sheet or baking parchment while eating big chunks with your other hand.

Bake ~10 min at 350F/165C. This is the most important part! You want to bake them until they lose the sheen on the top- only just until they stop looking gooey and wet on the top. Cardinal rule of awesome cookie making: DO NOT OVERBAKE. Let cool 2 min on the pan before you take them off, and you will have the chewiest, yummiest cookies ever.

Sunday, August 7, 2011

Sorbet Series: Peach


To make this sorbet you basically follow the green apple sorbet recipe. A couple things. I didn't blanch the peaches to remove the skin although that can be done. Instead the skin added a bit of extra color and texture to the sorbet. I wasn't too crazy about the dessert wine so I only added a little of it. I also added the juice of a lime although it's unclear how much it affected the taste overall.

We didn't actually use xanthan gum this time so we noticed that it froze a bit harder this time. If you're not using an ice cream machine, which we haven't till now, take the sorbet out of the freezer well ahead of time so it gets softer.

Saturday, August 6, 2011

Nectarine Crisps

Awhile back I made these "nectarine crisps" (for lack of a better name). They were so simple to make and absolutely delicious. Truth is you could probably substitute the nectarines with many other fruits - peaches, apples... etc. I had nectarines so that's what I used.

2 nectarines
2 tablespoons water
3 tablespoons all-purpose flour
2 tablespoons sugar
1/4 teaspoon ground cinnamon
2 tablespoons butter/margarine

1. Slice the nectarines into chunks or wedges. Place into dish. Sprinkle with water.
2. Combine the rest of the ingredients and sprinkle on top the fruit.
3. Bake at 350F/177C for about a half hour or until the topping looks crispy.

Thursday, August 4, 2011

Smells like... licorice!

I recently made a white gazpacho soup that The Pioneer Woman wrote about last week. The recipe calls for fennel, which I only just learned about for this recipe. Who knew it smells like licorice?? Check out the recipe on her website - it's pretty easy to follow. What's so great about it is that all the ingredients are pretty standard and easy to get. Plus it's interesting and different than the usual. And a chilled soup to have during the hot weather!

Tuesday, August 2, 2011

BreakFast Bagels (with a tangential discussion of regional variation in the gluten content of flour)


Why can’t one get a good bagel in Israel? To answer this question, one must understand something called the Pizza Cognition Theory, as proposed by New York Times journalist Sam Sifton. This theory states that, of the many different styles of pizza available, a person will generally prefer the style which he or she was first exposed to. This style becomes, for him or her, the very definition – nay, the Platonic ideal - of pizza.

The same can be said of bagels. Hailing from New York, that means I like bagels to have a glossy crust that crisps when toasted, and a doughy, dense yet soft, malty center. And poppy seeds, but that’s just me. Rachel’s Philadelphia kosher bagels are, in essence (as well as in name), New York Bagels. So we’re on the same page.

However, the NY bagel is not the only variety. Here in the Israel, the thinner, breadier, sometimes oval-shaped, and always sesame seed coated bagels are as much a local fixture in Arab and Middle-Eastern Jewish cuisine as their Yankee cousins. Thus, I posit that the primary reason one can’t get a “good” bagel in Israel is because most people here prefer what they’ve already got anyway.

That being said, there are plenty of places where you can get NY style bagels, usually in cities and neighborhoods populated by US expats. But any real bagel fan will tell you that the a bagel from Tal Bagels may be tasty, but isn’t the same. So the real question is: why is it so hard to recreate NY bagels in Israel?

No, the answer is not the water. It’s the flour. Israeli flour has less gluten in it, or to be more precise, comes packaged with less gluten in it. This was verified by a recent blog post I read, along with the additional information that Israeli flour is usually processed less and not bromated or bleached (although I usually bought unbleached flour in the US as well), and that US flour actually often has pure gluten added to it directly.

I could have told you that on my own after this attempt to make bagels. I was following a recipe from Peter Reinhart, whose book has so far given me a very reliable recipe for pizza dough, but I noticed that the dough was not developing as I was expecting it to. Undeveloped dough tears apart when you pull it, but proper gluten development gives you a dough that is increasingly smooth and elastic. This takes kneading and time, both of which I applied with my Kitchenaid dough hook. But the minutes went by and my dough was extremely soft, and totally lacking in smoothness and elasticity. It was still tearing.

I knew at once that there wasn’t enough gluten. The solution? Add more flour, I suppose. I kept adding, and adding flour. The dough absorbed it, but despite intense and extensive kneading, it just did not get right. Frustrated, I cranked up my already hot mixer and tried to beat the gluten into submission.

And then my Kitchenaid busted an axle.

The moral of the story is: don’t get frustrated in the kitchen (also don’t take on new cooking projects on fast days, when you are more likely to get frustrated). But although fixing the mixer will surely be an uphill battle, the bagels were not lost. After kneading by hand for a while, and seeing no improvement, I decided to shape the bagels, let them rise for the amount of time stated in the recipe, boil them and bake them. The boiling was done in water with a pinch of baking soda added to it, and the baking was done at some high temperature, with convection, with a flipping step, for an arbitrary period of time until they looked brown and tasty.

Those instructions are kind of vague, and they also leave out the sponge stage at the beginning where a thin, pancake-like dough is set out to ferment with two hours. This is because the bagels, while they tasted good, were not what I expected. The doughiness was too much, they didn't rise properly. The outsides were not smooth and too hard and thick.

But really, they were tasty. I strongly believe that this is highly independent of recipe. Google any bagel recipe, or this one, and make it. It’s probably your first time boiling bread before baking it, but it’s very easy if you just follow the instructions. It’ll taste good because it’s fresh and you made it.

Looking forward, I am going to try and find a place where I can buy pure flour gluten, which I do know is made by an Israeli company. Then it’s just a matter of either research or experimentation until I find the combination I want to recreate US bread flour and US all-purpose flour. The blog post has a suggestion, but since it is in volume measurements I can’t take it seriously. He does recommend sifting, though, which is a good tip.

And like I said before, Rachel and I really did enjoy these bagels. If I don’t find gluten soon I’m probably going to just make them again anyway.

Sunday, July 31, 2011

Ice Cream: Garden Mint Chocolate Oreo


Ice cream is one of my greatest loves. I am definitely not an ice cream snob as I found out this past week in Rome when I experienced gelato - rated the "best gelato in Rome" by some. It was in fact delicious (stay tuned for our attempts to recreate the fantastic pistachio and hazelnut flavors), but give me a tub of Edy's and I'll be perfectly pleased. In any case, I love ice cream but unfortunately we have very few if any options for decent ice cream here in Israel. So you can imagine how excited I was when my sister and brother-in-law got me an ice cream maker for a birthday present! They are way ahead of us in their ice cream inventions, having had their ice cream maker for a few months already, so when I heard about their latest experiment I asked my sister to share her recipe. Enjoy!

I found some recipes online for mint chocolate chip ice cream using real mint that looked really good, most notably this one. David Lebovitz is the ice cream man, so I figured it would be pretty good, but I didn’t want to use eggs. Eggs make the recipe more complicated and expensive. But I did want it to be super-creamy. I decided to make the custard with cornstarch instead of eggs, and made a few other alterations. Here’s the recipe I used:

125 grams mint, with stems

1 1/3 cups sugar

500 ml 10% cream

1 cup 1% milk

Dash of salt

250 ml 32% cream

4 Tablespoons cornstarch

Oreo cookies

1 bar of chocolate

1-2 tsp peppermint extract

I bought a bundle of mint from the grocery store pulled off all the leaves (I weighed it with stalks it was 125 grams) and combined that with 1 1/3 cups of sugar approximately, dash of salt, 500 ml of 10% cooking cream, and 1 cup of 1% milk. I cooked that until it was steaming but not boiling and then let it sit in the fridge for a few hours. There was a significant differences between how minty and green it was after the first hour and how minty and green it was after the second, so I would say leave it in for even longer if you want it to be even more minty and even more green.


When you think it’s minty and green enough, strain the leaves out. You have to really press and squeeze the leaves to get the minty-ness out of them. Discard the leaves and reheat your minty milk on the stove.


In the meantime, combine the 32% cream with the 4 tablespoons of cornstarch and whisk so that there are no lumps. After the mint mixture is hot (steaming, but not boiling) add in your cornstarch mixture.


Bring it to a boil and wait until it thickens while stirring. It should coat the back of the spoon/be the consistency you would expect hot pudding to be. When it’s done put it in the fridge to cool overnight and then process according to your ice cream makers instructions!


That’s the basic recipe for the mint ice cream. Also don’t forget to cover the custard mixture with saran wrap pressed into it while it’s cooling. I did and it formed a skin, but it was no harm done anyway. I think you could probably make it with more milk, less cream, or lower fat creams too -- this was just kind of what I had in the house.


I couldn’t decide whether I wanted mint cookies and cream or mint chocolate chip. So in the end I decided that I should just have both. I melted a bar of chocolate in the microwave and added a few teaspoons of peppermint extract to it.


My original plan was to dip the oreos in the mixture, but once I added the extract it got all grainy (probably something to do with the emulsion blah, blah, but whatever that’s Yoni’s department), so instead I just spread the chocolate over the oreos. I put them on a plate covered in tin foil, covered them in plastic wrap and stuck them in the freezer.


The next morning when the ice cream was churning I took them out and put them in the food processor. I pulsed them a couple of times to break them up some and then dumped it into the ice cream mixture towards the end. So good! The mint has an herb-like natural taste and the peppermint chocolate oreos are amazing. In theory you could also make this ice cream using regular old peppermint extract instead of mint leaves and it would taste more like store bought mint ice cream.


This sounds crazier than it is. It's really not that complicated. And it tastes so good.


--SNH

Sunday, July 17, 2011

Veggie Quiche (+Homemade Crust!)


What to make for dinner is often the most challenging the night before you are planning to go grocery shopping. Since grocery shopping has been a bit of a challenge in our new location, we came up with this elaborate (or not so elaborate but full of well meaning efforts) plan to come up with a whole two weeks of menus (breakfast, lunch, dinner) and basically only go shopping once every two weeks. I can discuss menu suggestions and the challenges of this plan another time.... Like I said though, the day before a groceries trip, the fridge (and shelves) are extremely bare and lacking in dinner options. We can, of course, just have pasta and tomato sauce (or ragu perhaps?) because we seem to always have those in stock. But eh, that's not so exciting. Plus, it's hot. And pasta = heaviness.

So what are my options? I have:

two green peppers,
several tomatoes,
eggs,
onions,
and milk.

Put it all together and we have a quiche! And to make this veggie (and cheese-less) quiche more delicious, I made my own flaky pie crust. Admittedly we need to replenish our stock of food supplies but no one will be complaining about dinner tonight!

The recipe for the crust came from Food.com. (Although I did pre-bake my crust for 10-15 minutes at 200C/400F.) The recipe for the quiche came more or less from myself so here goes:

Saute the vegetables (leave the tomatoes out) with a bit of olive oil. While the vegetables are going, mix together 4 eggs, 1 cup of milk and salt and pepper to taste. When the vegetables are finished, pour them into your crust. Then pour the egg mixture over the vegetables. Slice the tomatoes into thin rounds and place on top. Bake at 190C/375F for 30-45 minutes or until the quiche is set.

Thursday, July 14, 2011

Sorbet Series: Sour Green Apple


After our successful results with melon, Rachel and I flung open the fridge and pondered which ingredients we could sorbetize this week (dear Blogger spellcheck: sorbetize is obviously a real word; please stop putting rude red lines underneath it).

Although Israel's formal period of austerity may be decades behind us, a glance inside our fridge during a typical weekday suggests that this young couple is bringing it back in style. Our produce stash consisted of some tomatoes and cucumbers, a bit of spinach, and apples. Apples it is!

We had a combination of tart Granny Smiths as well as those sweet green apples they only have in Israel, and are otherwise known as the Best Apples Ever (unless you are Rachel and prefer Granny Smiths). This was not a problem; in fact, blending tart and sweet proved to be the defining characteristic of this sorbet.

We also had half a bottle of sweet dessert wine brought to us by a guest last week, which was perfect. Not only would the sweet white wine complement the apples, but the alcohol would help by a) keeping ice crystal growth in check, thus giving us a smoother product and b) making our sorbet alcoholic.

As I'm sure you remember from the last sorbet post, we don't have an ice cream maker and so our technique consists of freezing chunks of fruit, then blending them in the food processor along with simple syrup. Thus we were faced with our first challenge, for apple chunks tend to brown pretty fast. The solution is science. I will spare you the lecture on polyphenol oxidation pathways, though, and just say that you can keep sliced apple from turning brown by using something acidic like lemon juice. Common household knowledge.

But why use lemon juice when you have... citric acid? Citric acid is a popular pantry item in Israel, mostly because it's very effective at removing the white chalky calcium deposits that foul up one's קומקום thanks to Israel's very hard water. Why? Because it's an acid! Haven't you been paying attention?

Citric acid has another use, however, and that is giving sour taste to things like sour candies. We don't do a lot of candy making, but it struck me that by coating our apple chunks in a citric acid solution, we could both keep them from browning and make them nicely sour. I didn't measure, but I'd estimate I used maybe a teaspoon of citric acid in a 1/4 cup of water. You can sort of just mix the solution until its sour enough, but not too sour. Then we put it in a ziplock back and Rachel tossed in the apple pieces as she cut them. And then we froze it.

There was a second challenge. Most online recipes seem to indicate that simply freezing apples and blending them would make a less-than-smooth sorbet. They generally recommended cooking the apple first. This is because cooking helps release pectin from the apple, and pectin makes the sorbet smoother. But this also makes the sorbet brown.

Instead, we turned to an ingredient that is relatively obscure, but most definitely a rising star in the culinary world. I give you: xanthan gum. Xanthan gum has been used in the food industry for ages, but only recently has it started appearing on more mainstream shelves. Why? Because it's indispensable for people doing gluten-free baking, and that market has been definitely growing lately.

But that only explains why it's easier to get. What does it do? Again, I'll spare you the lecture and boil it down to this: everything. If you have a texture issue, xanthan gum will solve it 9 times out of 10. I know I'm being a little silly and unscientific, but trust me when I say that one container of xanthan gum in your pantry will a) allow you to change the way you make tens, if not hundreds of dishes and b) last you forever, since you usually only need to add it in fractions of a teaspoon.

Also - I know xanthan gum starts with an "x", but don't be afraid. It's made from plant stuff. I would even call it "natural", but the distinction between natural and synthetic when it comes to food is kind of a pet peeve, and I'd rather not get into it. The bottom line is that xanthan gum is safe, and expect to see and hear about it more in the future. You heard it here first.

Fortunately for us, there's a natural food store just a short walk from the Technion gate, and they carry xanthan gum. A container set us back some 40 shek, but, like I said before, this stuff lasts a long time.

With all the necessary ingredients, we got to work. The apple chunks were easier to grind, but they needed more liquid to come together than did the melon, so it's a good thing we had wine in addition to our syrup. And the xanthan gum was key. Before it, our sorbet was good but slushy. With it, it became smoother, like icy applesauce. We started with 7 apples, which took 3 shifts in the food processor. Each time I added about 1/4 of a teaspoon of xanthan gum. For a final touch, I shook in a little more citric acid to give the sorbet a tart kick in the pants.

The result? I think this sorbet is phenomenal, and our best (of two, ok) yet. Rachel preferred the melon, mostly because she likes melon better than apple.

Anyway, time for me to get back to studying for my last final. Among other things, it covers xanthan gum!


Honey Whole Wheat Challah


In the spirit of experimentation I tried a new challah recipe this week. Last time I baked challah I was informed that I could just use the mixer to knead the dough instead of doing it with my hands. Thinking that this would make my life so much easier, I began the recipe with high hopes.

After kneading the dough for awhile with the machine, the dough was still very sticky and appeared unaffected by the efforts. I assumed the dough would clump up around the dough hook and basically pull away from the edge of the bowl. It didn't do this and so I kept adding flour in the hopes that it would. After awhile, about 15 minutes or so and at least a few extra cups of flour, I decided the dough (and I) had had enough. I managed to get it out of the bowl and into a clean and oiled bowl for rising. Turns out it was OK and the kneading seemingly worked but in the process I had become a bit frustrated. I used about a kilo of flour in total. What was I doing wrong?

I discussed this with my husband, the food scientist. He explained that measuring flour in cups is highly inaccurate (since you could fill up a cup of flour, press it down firmly and then add a lot more) and a better, more accurate, way to measure out flour is by weight (in grams). In the future I'll look for a recipe that measures out the flour in grams, which works out well for me since I love using our food scale. (It appeals to my detail oriented and exacting nature.)

Here is the recipe I used. A couple modifications; I used instant yeast so I didn't have to bother letting it stand for 10 minutes. I also used 1/2 cup of honey (date honey) instead of 1/3 cup - to emphasize the sweetness a bit more. Lastly, I tried a four strand braid - watch this video tutorial for instructions.

Lesson learned: measure your flour by weight. Questions: How easy is it to come up with your own bread/challah recipe? Is this one of those things that takes a lot of trial and error that I won't have the patience for? Maybe I should let others pave the way and just benefit from their hard work. Or I can let the food scientist in the house figure it out for me....

Chocolate Fudge Cookies

An attempt to find the perfect chocolate fudge cookie...

If I was in the U.S. I would probably have just bought a brownie mix and made cookies with it instead. Since I am mix-less and on my own here, I'll have to make do with what I have. I used this recipe. As usual I made some modifications. Instead of yogurt I used a chocolate pudding mix (made with soy milk). I also had to find a brown sugar substitute since I was running low. My substitute worked like this - for every 1 cup of brown sugar the recipe calls for, I substituted 1 cup white sugar plus 1 1/2 tablespoons honey. You could probably just substitute 1:1 with white sugar alone. What difference does it make? I did consult with a food scientist but the answer didn't sink in. A quick internet search revealed exactly what I was looking for: "Are Brown and White Sugar Interchangeable when Baking?"

A little trick to get the "cracked" look with the cookies - place the dough onto the cookie sheet as balls (somewhere between a teaspoon and a tablespoon each) and bake for 5-7 minutes. A few minutes before they're done - take them out and using a spoon, press each one down a bit. You'll notice the cracking right away. If it doesn't work exactly, leave them in for a bit longer and then press down.

All in all the cookies were delicious - very chocolatey (thank you chocolate pudding). As always there's room to grow.... With this recipe I would say my issue is the amount of sugar. Next time I'll either repeat the recipe and cut down on the sugar or try a different one.